
DIY Spring Roll Wrappers
This step by step recipe for DIY spring roll wrappers will give you an extra crispy shell to your lumpia, turon, crab rangoon, egg rolls…The possibilities are endless!
This post may contain affiliate sales links. Please see my full disclosure policy for details.
Why Make Your Own Spring Roll Wrappers?
Why make homemade spring roll wrappers when you can buy them, right? Well, here are some reasons:
- Always on hand for your cravings – I decided to try and make my own spring roll wrappers after forgetting to buy some during my trip to the Filipino grocery store. I had a craving and wanted lumpia and turon ASAP.
- Never have to worry about breakage – Often I find that even after putting a warm, damp towel over store bought spring roll wrappers, they are still dry and brittle, and they break apart when wrapping the already delicate ripe plantains. These DIY spring roll wrappers are super pliable and moist!
- Know what you’re consuming – Even though spring roll wrappers are fairly inexpensive to buy, I like knowing that the ones I make do not have any preservatives or food colorings. Flour, salt, and water is all that these homemade wrappers have in them!
- They look better – The lumpia and turon you make from homemade spring roll wrappers will have a deliciously crunchy and bubbly exterior when you fry them! (Just look at the Apple Pie Turon I made for proof)
How to Make Your Own Spring Roll Wrappers
Like many of you, the thought of making my own spring roll wrappers was quite daunting! However, I quickly found that making them was pretty easy!
Dough
You start off by making the dough. Salt and water get mixed into a bowl first. Hot water is good for this, as it makes the dough more pliable, but you can also use cool water. Then, add the flour and mix until a rough dough forms. Then, knead the dough either by hand, or in a stand mixer with a dough hook attachment on medium speed. By hand, this will take about 5 to 10 minutes, and with a stand mixer it will take about 3 to 4 minutes. Stop when the dough is smooth and bounces back after poking it slightly. Cover the bowl and let the dough rest for 25 minutes at room temperature.
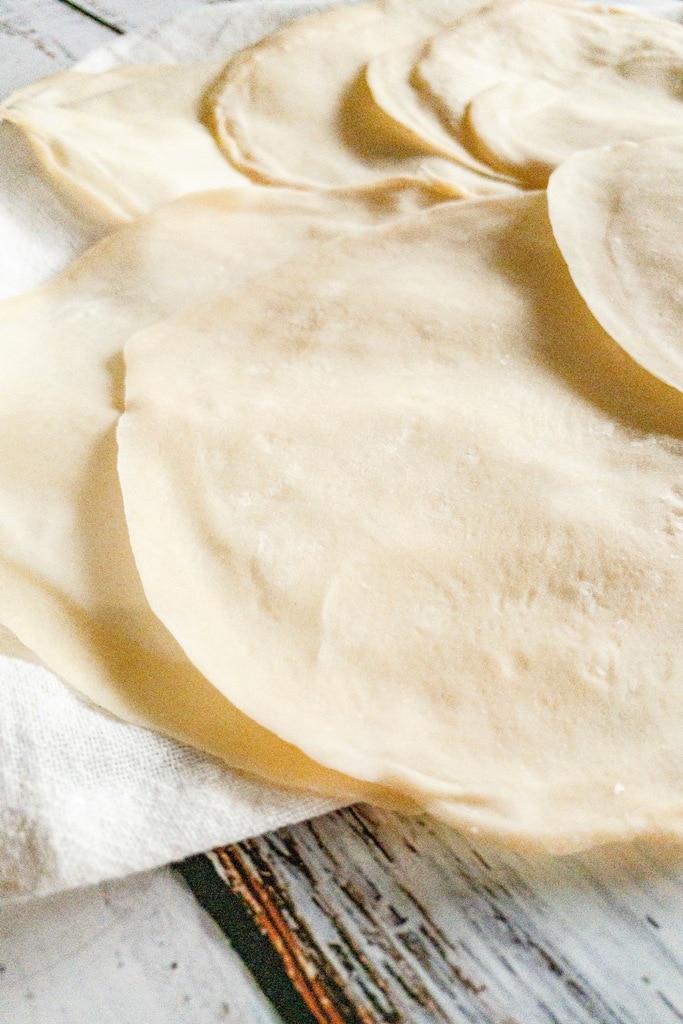
Roll the dough into a log and cut into 12 pieces. Dust each piece with flour and roll into a four inch circle. The circle should be equal thickness throughout. Repeat this with all of your dough pieces.
Stacking and Rolling
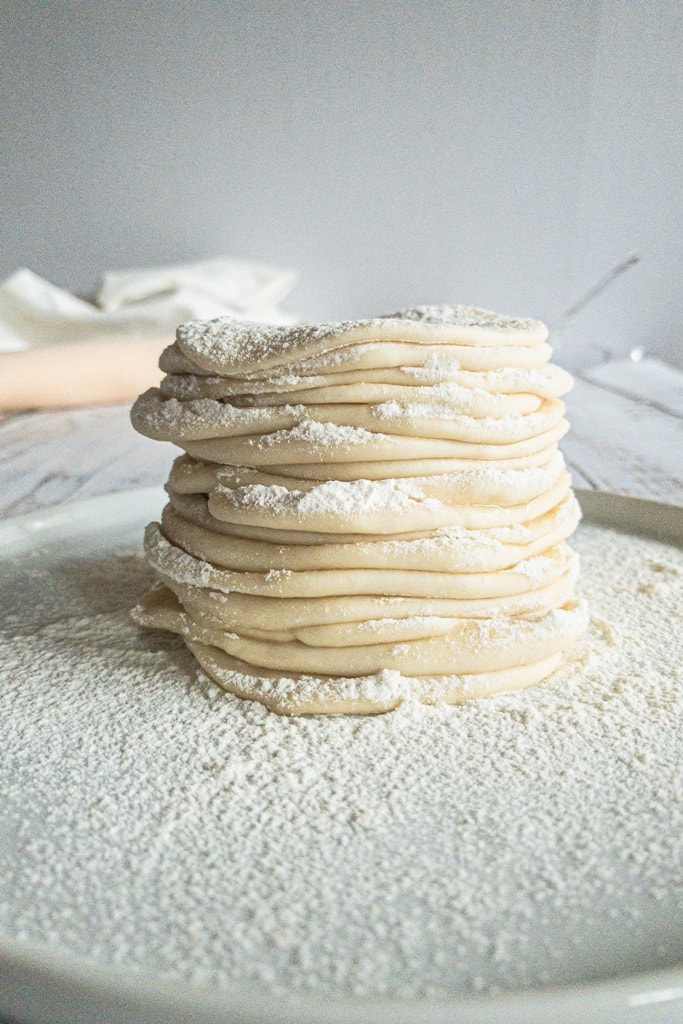
This next part is key in getting those peelable spring roll wrappers, like the ones you buy from a grocery store. Stack the circles with oil and flour in between each layer, roll them out again to larger circles, cook over low heat, and then peel! As you can see in my pictures, I like to stack them in a large stack, with oil and flour dusted over each piece, before making smaller stacks.
Make sure you make stacks of 4 or 5, otherwise the stack gets a little unwieldy and uneven when rolling them out to a larger circle. Each stack should roll out to 9″ to 10″. If you find that they’re difficult to roll out, let them rest for 15-20 minutes, with a towel or plastic wrap covering them so they don’t dry out. Another tip for rolling them out, is to keep flipping the stack, so the top and bottom roll out evenly.
Cooking your Layers
Then place them in a dry, non-stick pan set over low heat. Cook the first side about 10-20 seconds or until it bubbles up. Then cook the next side for 10 seconds. Keep in mind, you’re only looking to “dry” out the wrapper, not get any toasting or browning on them. If they do start to get browned in areas, turn your heat down. Place on a plate and cover with a towel so the steam helps them stay moist.
Once cool to the touch, you can peel the layers apart. I like to peel around the edges before peeling away the center. Peeling away the layers slowly is key to not tearing your wrappers, but even torn wrappers can be used for other things like wonton chips.
You can trim your edges off to make spring roll wrappers squares like the store bought kind, but I’ve also used untrimmed circles to make turon and lumpia. If you do decide to trim your edges, use the scraps to make fried chips.
For a video tutorial, I like this one from Kusina ni Lola on Youtube.


Storing Your Wrappers
I usually use these right away, but if needed, I place these cooked wrappers into a large ziplock bag. They keep in the fridge for about a week, and in the freezer for one month. Before using, make sure to defrost them completely. Also, make sure they’re dry before frying, or you risk hot oil splattering all over!
DIY Spring Roll/Lumpia Wrappers
Ingredients
Method
- Whisk flour and salt together in a large bowl. You can also put them in your stand mixer bowl, with a dough hook attachment.
- Add water and mix together with your hands or a spatula until a rough, shaggy dough forms. If using a stand mixer, knead with the dough hook attachment on medium speed. Knead until the dough is smooth. Let dough rest for 25 minutes in a covered bowl.
- After resting, cut dough in half. Roll each half into a log. Cover one log while you work on the other.
- Cut one log into 12 equal pieces. Roll each piece with your hands to form a ball. Keep them covered with plastic wrap or a damp tea towel as you work so they don't dry out.
- With a rolling pin, flatten each piece into a small 4" circle.
- With a silicone brush, brush canola oil over one circle. Use your hands or a small sifter to sprinkle flour over your circle. Repeat until you have a stack of four circles.
- Roll the stack out, continuously rotating and flipping to keep the circles equal, until the stack is flatter and 8" to 9" in diameter.
- On a non-stick pan over low heat, heat the stack for 20 seconds, or until it bubbles up. Flip and cook for 10-20 seconds.
- Let the stack cool down before attempting to peel the layers away. Repeat these steps until all dough pieces are used.
- Use your homemade wrappers for turon, lumpia, or any other recipe that calls for spring roll wrappers!
Notes
- For peeling the layers apart, it helps to keep one hand flat on the stack as your use your other hand to grab at the edge of a layer and pull.
Want more recipes? Subscribe to our recipe newsletter and follow us on Facebook, Pinterest, and Instagram for more noms and updates.
